Showing posts with label leather carving. Show all posts

Wednesday, 14 September 2016

Making stuff for Feast of the Bear - Part 1 (With Pictures)

Feast of the Bear was a super important event this year, but that's not all that unusual. For some reason, stuff seems to happen at Feast of the Bear. That's the event I received my Award of Arms in 2008, at the very same church where it was held this year.

At Trillium war in July, to a great deal of rejoicing, Mistress AElfwyn was put on vigil for the Order of Chivalry. Their Majesties wanted to do the elevation before the end of Their reign, so AElfwyn selected Feast of the Bear as her elevation event.

As AElfwyn's apprentice, I had a small part in the ceremony, so we've spent the past few weeks making things so that I would look the proper Anglo-Saxon(ish) part. That's why we did the fabric shopping trip to Montreal, so we could find fabric that had the right colour tones and fibre content. I also made a pair of new shoes, since a pair of modern running shoes would have ruined the look. :)

On top of all that, Master Giovanni asked me to work with him again on the vigil book by doing the leatherwork for the cover.

So, its been a busy few weeks. Here is part one of my Feast of the Bear work, the vigil book. Other stuff will be covered in the next post.

The book:

I knew I wanted to do something more than just dye the leather, which certainly added some complexity for both me and Giovanni. I had to be precise in the measurements to make sure any tooling etc. was placed correctly for when he made the book. I pushed the envelope a lot on this one, doing a number of new techniques I'd never tried under a tight timeline. Some of it worked, others didn't. In the end, I figured that AElfwyn would appreciate me trying to push the envelope so I went with it. :)

My initial idea was to base the cover on the St Cuthbert Gospel, which is an 8th century Anglo-Saxon book. However, the cover on the Gospel is super complex, with raised sections, tooled sections and is both dyed red and painted with gold highlighting (or more likely gold leaf). Given the timeline for the project I thought it best to take inspiration from the design, but not to try to replicate it entirely. I also wanted to customize it a bit for AElfwyn by replacing the core design with a boar.

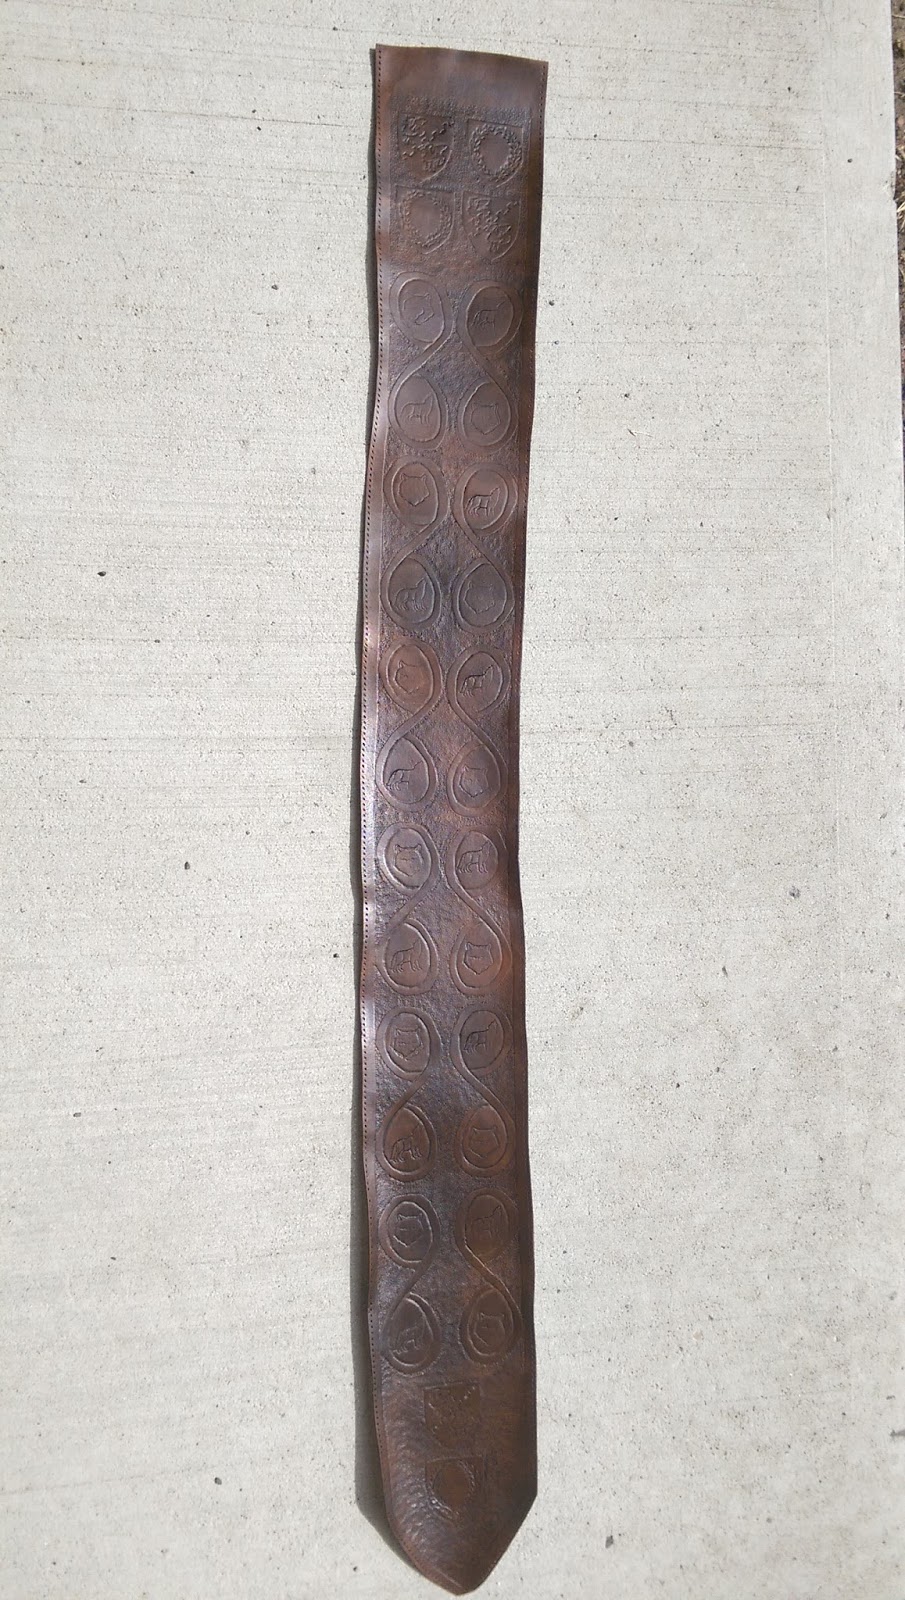
First I had to sand the leather to get the pressed layer off (I had to do the same thing for the last book we did, it was AElfwyn's suggestion at the time). Once it was sanded I did the tooling. Here's the tooled wet leather:


Once I did the tooling I realized I screwed up my placement, and essentially tooled the back cover. So I had to modify the plan and do matched tooling on the front and back, like so:


Once the leather was tooled I had to dye it. This is where I made another mistake. Rather than using my existing period red dye recipe, I tried to modify the process based on what Mistress Lucrece did for her recent book project. My hope was that it would give me a truer red. But these are natural dyes and any little variation can throw things off, so it ended up not working out quite the way I intended. The colour was more a brownish purple than red, and it didn't bind well to the leather. More experimentation needed, but I ran out of time and had to go with it since a dye batch takes a couple of days to make.

The dying process took a few days between pre-treating the leather with alum water and then doing multiple coats of dye with drying time between. Just in case the tooled section messed up I dyed the whole skin so Giovanni would have enough space to make a plain leather cover as a back-up plan.

Once it was dried, I used my black water-based leather dye from Zeli's to make the boars black. Unfortunately I found because the red dye wasn't adhering well to the leather, painting on top of it also presented challenges. Each black coat had to dry much longer before I went back for another coat, or it would come right off. I was also worried it would rub off when my top coat was applied.

Once I got the black to where I was happy with it, I took some metallic gold craft paint and a micro brush and painted all of the tooling lines on the boars. I bought five different types of paint and tested them to see which was the least likely to rub off. The best of the bunch was from Martha Stewart that I bought at Michael's.

Here are pictures of the boars painted.


I then had to decide what to do with the border. The original Gospel had a raised line that delineated the border, but the logistics of knowing how much space to leave Giovanni to do that were daunting, so I decided to skip that. In the end I decided to paint the knotwork with the gold paint, but leave the outer lines plain.


After that I let it all dry and applied the a modern top coat to hopefully stop anything from rubbing off as the book was handled. This led me to doing a bit of touching up on the boars as some of the black flaked off, and it did wear away some of the colour, but not too bad. I also had a problem with the top coat making a chalky layer on the leather, which has never happened before. That really pissed me off but no amount of buffing was helping get rid of the coating.

In the end I think it turned out pretty well, although there's a number of things I would do differently. Giovanni did a great job making the book itself. I'm sure it was a nightmare trying to make sure the covers lined up properly because of the tooled border. 

Avelyn described it as looking like an actual artifact that was pulled form the ground (which I think is something that would please AElfwyn) because of the way the dyes rubbed off in some places. It looks weathered.

Here's a picture of the final book that Giovanni took once it was finished.


Tuesday, 13 September 2016

Summer Siege Wrap Up - With Pictures

Running a bit behind with blog posts, its been a crazy few weeks getting stuff ready for multiple events.

Summer Siege, as always, was a busy event for me. It was also a Royal progress stop this year as we had a Laurel ceremony happening, so the attendance was significantly higher than usual.

Rapier:


Normally I'm running the rapier list since I'm the Canton's Rapier Marshal, but this year we tried a new format for the A&S activities and as Baronial A&S Minister I ran that instead. Gavin was kind enough to volunteer to run Rapier, and while we didn't have the record number of fencers we had last year, it looked like a pretty good turn-out and folks seemed to have fun.

Normally in the past for the event I have borrowed the Caldrithig armoured combat list poles from His Excellency Shahid, but they are rather large and heavy, and really overkill for rapier. So this year, Avelyn and I worked to make a new set of list poles, based on the ones Jocelyn loaned me last year for the Althing. We even got a bit of power tool help from Avelyn's dad, since our little hand drill was rather under-powered for the job.

The best part of them is that instead of taking up half the back of our truck, I can disassemble them and they fit into a duffel bag. They're super light weight.

Here are a couple of pictures of them in action. We'll call them the prototype, since there are some things I may want to adjust, but they seemed to work OK for their maiden event.


A&S

A lot of the work for the A&S activity was before the event, coordinating judges and entries etc. What I was hoping for was a chance for local artisans to get some feedback on projects. I had a good host of people volunteer to judge, which was really great. Unfortunately a number of people who had planned to enter items weren't in the end able to make the event. We did have one lovely embroidery entry and she seemed to get some good feedback so that's good. Hopefully it will continue to grow in the next few years.

Thrown Weapons

Their Excellencies have been using Summer Siege to run both their thrown weapon's and archery champions tourneys in recent years, as its one of the few venues that lends itself to those activities in the Barony. Last year I managed to win the Thrown Weapons tourney with what was easily my best ever day on the range. The chances of me doing as well again this year were slim, but I entered again this year to defend my title, or at least make sure that I gave the winner a run for their money. :)

During the tourney I knew I didn't throw as well as the previous year, but I hit a good number of throws from 10 ft, but not much from 20 ft, so I knew it would be tight.

In court I was called up to step down as champion, where I surprised Their Excellencies with a new axe and heraldic axe cover for the champion (I did the same when I stepped down as Rapier Champion, so now it's twice, so its a tradition!). Eluned picked up the axe for me at Pennsic and I made the cover based on my existing axes.

Here's a picture of me returning the tabbard and presenting the axe.


and here are some close ups of the axe and cover:


So I bow my way out of court, go back to the audience and resume taking pictures. They call up the Marshal, who starts calling out the top three, and low and behold, they call me up as the winner and Their Excellencies get to give me back all the regalia once again. I think They enjoyed the joke of handing me back the axe after I just presented it. :)

Other things of note:

I would be remiss if I didn't mention the Laurel elevation in more detail. THL Alais (now Mistress Alais) focuses a lot of her research on shepherdesses and peasant practices. Her elevation was really unique as they modeled it after a Flemish village wedding ceremony, including using dances as part of the ceremony. It was really neat, and totally suited the event. I'm glad the weather was nice (if hot) and that everything seemed to go well.

I had been asked to be their "official" photographer for the elevation so I tried to make sure I got lots of pictures while I was hopping between activities. I was also able to do a family photo for her after the ceremony, which is always a nice keepsake.

Sunday, 15 May 2016

Kingdom Award Badges - Round 2 (With Pictures)

This weekend I kept chugging along with my work on developing cutwork patterns for our Kingdom award badges. I'm now moving on to a few of the slightly more complicated badges which require a bit of a different technique.

First up, the Thorbjorn's Hammer badge.

The pattern for this badge is actually fairly simple, but it has a couple of aspects that add an element of complication to the mix. Both are elements I'll need to master as there's lots of evidence these techniques were used for the cutwork book covers, so I may as well get working at it.

So the main difference between this and the previous two badges is that the main charge on the badge, the hammer itself, is actually a floating element. So, unlike the other badges where it was just a matter of cutting out a pattern, for this one I actually had to cut out the hammer as a stand alone element and then paste it separately.

The other slightly different element is that the hammer needs a bit of tooling on it so that the handle has the right 3-D feel to it. So I had to do small tooling on a cut-out pattern before it got stuck to the badge.

Here's a picture of the pieces cut out:


And then of course after they are painted (with fabric underneath to get the right contrast):


Next up is the Orion badge. It has similar elements, with the ring on the outside and a floating main charge in the middle. The main issue with this one is the harp because I have to cut out the harp strings, which will give me a bit of practice on really small cutwork shapes.

Here are the pieces cut out and painted.


I have two different purple fabric colours so I tested it with both. I ended up going with the darker colour on the left because it's more herladic, although I think I need to find some different fabric that's something in between the two for future badges.


Aaaaaaand, here are the two finished badges trimmed and mounted on a belt loop.


I actually think the Hammer badge is my favourite so far. Really happy with how it turned out. I think folks will really like wearing something like this (particularly if I can shrink it down so its a bit less cumbersome).

I think the Orion still needs some work. I'd like to get the strings straighter, and next time I think I'll use purple to do the outer ring instead of black, it makes the overall badge too dark right now. Plus, I think I'd try to find some lighter fabric for the purple.

Tuesday, 10 May 2016

Kingdom Award Badges - New and Improved with Cutwork/Filigree (with pictures)

As you'll have seen from my most recent post, I'm starting the process of working on developing some new leatherwork skills with the end goal of recreating 15th century (ish) Islamic filigree book covers. There's lots to do, but I thought I'd get started by working on my cutwork/filigree skills.

When I'm working on this kind of skill development, I prefer to do it by doing something useful, rather than just wasting leather doing samples. So I thought about my project from several years ago, where I developed tooling patterns for the various award badges. So I'm upgrading my award badges to version 2.0 - now with cutwork.

Much like with the tooling versions, I started out with the easiest one first - the Maiden's Heart. It's a fairly straightforward pattern with large areas of colour. I then moved on to the Order of the Wain, again because it has a fairly straightforward colour pattern that lends itself well to cutwork.

I started out by marking the line pattern onto a wet round of leather, the same as I would for tooling. However, instead of using the swivle knife next, I actually cut out pieces of leather to create blank areas in the pattern. In the case of the Maiden's Heart, I cut out anywhere that should be blue on the pattern, while in the case of the Order of the Wain badge, I cut out the white areas.

Here's an example, using the Maiden's Heart:


The original book covers have a layer of paper or silk under the cutwork leather to have the colour that shows through. I didn't want to use paper since these could get wet, and I didn't have the right colour of silk so I went with cotton for the purposes of the badge.

Here it is over the blue cotton fabric (although looks a bit closer to purple in the light of my work desk in the basement):


Then of course I have to paint the alternating colour on the leather. That's also a period practice, lots of examples of painted leather on tooled artefacts. Many of the books have either dyed leather or colour accents applied to the surface of the leather (often goldwork). 

Here's the Wain badge at the painted stage:


I cut the fabric in a round to match the shape of the leather and paste it down onto a round blank piece of leather the same shape and size as the top. I then paste the cutwork piece on top so that the fabric is sandwiched between. I also cut out a strip of leather about an inch wide and the length of the circle to form the belt loop at the back. I then punch the holes around the edge of the circle and sew it all together using some light leather as trim (since otherwise the edges of the circle would be pretty messy.

Here's a picture of the two completed badges (with a ruler as per Her Excellency Lucia's request to see the scale of the item).


So a pretty good start. They are much quicker to make this way than with the leather tooling so that's a big advantage. They do use a bit more leather though, so there's a bit of a cost trade-off for time.

I plan to experiment some more with the other badges since they'll require a bit more thought about how to do the patterns with the cutwork. I'm also thinking of scaling down the pattern so I can do the badges smaller. That wasn't feasible using the tooling techniques because my skills just weren't there (at least with the more complicated badges), but at least for these two I could probably drop the size by half and still be doable using the cutwork. It might make the badges more wearable for people, as right now they are a bit big (for my preference at least).

Sunday, 24 April 2016

Planning the next project - Islamic filigree book covers

For those who've been following the saga of the stick purse/leather dyes over the years, you'll know I tend to pick major projects that will take me several years to complete. That's largely because they usually require me to learn new skills along the way. Since the stick-purse is nominally done (I say nominally since I plan to keep fiddling with the dyes as a background activity), I need a long-term new project.

I'm now officially at the starting line to start what I am dubbing "The crazy, what the heck are you thinking, Islamic filigree book cover project" (Trademark pending). I'll call it the CFP for short (Crazy Filigree Project).

I've contacted the Curator for the Islamic collection at the Chester Beatty Library in Dublin, where I first saw these crazy books. She's shared with me a paper she wrote on how they were done, along with some really close up pictures of some examples. While the pictures are super helpful, they've also showed me that this project is even tougher than I thought. Not only did they do cut-work/filigree patterns in the leather that are typically ornate for the illumination of that period, but there's leather tooling on the leather, in spaces that are only a few millimeters wide. I have no idea how they managed it, but its scary fine detail.

Here's an example from another source. This is a book from the 15th century. The area that's blue has actually been cut out of the leather and is showing the silk or paper that was placed underneath. The red lines that swirl through the blue is the leather lacework pattern that's left behind from the cutwork.

http://islamic-arts.org/wp-content/uploads/2011/10/dpc2125-176.jpg

So, lots to do:
  • Research more on period Islamic/Persian book styles
  • Acquire both bookbinding equipment/supplies and knowledge
  • Work on my filigree and bookbinding skills
  • Develop filigree pattern for the cover(s)
  • Fail several times, probably by cutting the filigree wrong, or slipping with the knife and cutting off chunks of filigree
  • Swear a lot
  • Figure out if I want to add to the complexity by using my period dyes (I'd put money on yes cause I'm that kind of crazy)
I'l probably need to work on this in stages, like I did for the stick-purse and dyes, so several rounds of entries at QPT before the final thing is entered at Kingdom A&S.

I think for this year my goal will be to do the background research, and to work on my bookbinding skills. So for this fall's QPT, I'll try to make my first complete leatherbound book, which I can enter and get advice.

If I'm really productive I might be able to do some sample filigree work on a flat piece of leather, maybe as a scroll blank or something. I'm not going to try to get to that small a scale for my first attempts, but it's a cool enough technique that I bet some people would love it, especially Middle Eastern personas.

The other thing I could do is develop another round of badge patterns but using cutwork instead of standard leather tooling. I bet those would look sharp.

Wednesday, 2 March 2016

Quiet day at Practicum

Oops, noticed I wrote this but never posted it. Guess its been busy. :)

It was a fairly quiet day for me at Practicum. I didn't have time to pull together any classes to teach this year because of my surgery recovery. Since there weren't really any classes that interested me (it was a Norse theme this year and I tend to do later period stuff) I decided to setup an all day leatherworking workshop.

Of course, this meant basically packing up all of my books, tools and gear and moving it from my basement to the site, which filled several bins. I needed a dolly to haul it all in.

I essentially spent the day working on my Kingdom A&S project and people could pop by, try out tools, flip through my leatherwork library and ask any questions they might have.

I was able to introduce a newcomer to leather tooling and stamping (and they got to take a scrap of leather they stamped back home with them) but other than a few good chats with a few people who had some specific questions it was mostly me doing my thing and people popping by to visit between their classes.

I was able to line up a few judges for the Baronial Championship at Break the Back (thanks all who've volunteered so far) and talked to some people about their entries.

I would say I'm about half done the work on my Kingdom A&S project.  I have to sew on all of the trim pieces and then do the final assembly. It's going to be tight since I also have to do up the documentation for whichever project I end up entering. (Note since this was written I've almost finished, just a few last pieces to do and then the documentation).

There were two highlights for me, both at court.

First, I was able to witness His Excellency Giovanni being elevated as Ealdormere's first member of the new Order of Defence peerage. Giovanni and Lucia were Baron and Baroness when I started fencing (or maybe Xristina was Vicaress at the time but they were certainly my first Baron and Baroness). One of my first really positive memories of fencing at events was my first Pennsic (and I think their first as Baron and Baroness) when they asked me to represent them as Baronial Rapier Champion until they could hold a tourney ( I wound up being their champion for more than a year). I was severely outclassed at the Champion's tourney from a skill perspective, but I think I held my own in the Q&A and swimsuit portions of the competition. ;) I didn't win one bout in any of the three tournaments I entered but I wore the Hare proudly. Of course, the next year was the famous "I want that bunny dead" incident during the town battle. You can ask Lucia about it, she tells it better than anyone else (and the myth keeps growing with every telling, as all good stories do).

The second highlight, and with all respect to our new Master of Defence, perhaps the biggest highlight, was seeing my Lady Avelyn totally gobsmacked as she was called into court and inducted into the Order of the Wain. She was only there because she'd written the text for an award scroll (of course) and wanted to see it presented (she was aiming for a record puns per inch of text). But I guess the surprise was on our new Ladyship. :) It's so well deserved, even if she has trimmed down the number of officer positions she currently holds from the previous high of 7 simultaneous positions.

Wednesday, 13 January 2016

New throwing axe cover for Baroness Christiana (with pictures)

So this one has been a long time posting but I couldn't share it publicly until the big reveal for Her Excellency Christiana. She was elevated to the Order of the Pelican over a year ago now at 12th Night in January of last year. At the time I promised to make her a fancy throwing axe cover. Unfortunately, last year was not a fun year for us at home so I've fallen way behind on my backlog of promised projects. I finally got this one done in the fall but because I haven't been to many events in the southern part of Ealdormere this year, we haven't really crossed paths. Fortunately, Lady Augusta came up for a visit for Feast of the Hare in November, and I was able to send it via Talfryn courier. She delivered it to Christiana at Wassail.

I had the advantage in making the pattern in that Christiana and I use the same type of throwing axes. HE Percival also sent me a tracing of one of her axes, but in the end I just used one of mine as a 3D model.

It isn't necessarily a period design, but I think the technique of wrapping leather around an item and making a case/sheath is probably period appropriate. I did try to search out some period axe covers but I didn't really find much. Maybe a future research project?

In any case, the first picture below shows the pattern shape I settled on based on the shape of the axe. I tooled in the Pelican on one side and then did a series of small winged snails along the front flap (Christiana's primary charge in her heraldry). 

I had a hard time settling on a main colour because I wanted good contrast and was concerned if I used red the little blood drops from the pelican would be lost. In the end I used two different reds, a darker read as the main colour (which is a bit like a brick-red) and then a brighter red for the blood drops. It doesn't pop as much as if I used a contrasting colour but the white snails and pelican sure do, and it is Ealdormere after all so there has to be lots of red.


I then folded the cover around the axe and laced the bottom and the edge using artificial sinew (I thought about using waxed linen thread for authenticity but thought the artificial sinew would be more durable given that a sharp axe would be sliding in and out of the item). This is the pelican side of the cover on one of my axes.


Here's the back with the flap tied down using leather laces. Next time I'll have to rethink the closing laces as they get in the way a bit this way when you try to put the axe in or take it out. It's a bit of an awkward design, so there's room for improvement in the engineering. You'll also notice there are only four snails on the final piece while there were five in the picture above. I had to modify the size and shape of the flap once it was assembled, and one of the snails had to be sacrificed. That'll teach me not to do a mock-up of a new design.


Here's the final piece fully assembled, just before it went out the door. I'm hoping she likes it. :)


Monday, 14 September 2015

Surprise Rapier Sheath for Albrecht (with pictures)

Haven't posted for a while, largely because I didn't want to spill the beans on a surprise. But now that its been delivered I can unveil the rapier sheath that I did for Lady Emelote's fundraising event.

As announced previously, the winners of the draw were Their Excellencies Percival and Christiana. However, the trick was that neither of them are fencers, so a hand-tooled rapier sheath was probably not going to be particularly useful. :) As a result, they asked me to do a custom sheath for Albrecht for his elevation to the Order of the Laurel at Lady Mary this past weekend (now Master Albrecht).

In consultation with his lady the length is custom to his preferred rapier length (yes Albrecht, everyone was in on this plot). She also felt that his preference would be to go with more natural tones rather than the heraldic colours that I usually do. So I went with a bit of a different, more subtle approach. But because this is a very special occasion, I didn't want to just do a plain brown sheath, so I essentially did tooling covering the entire sheath.

Given that Albrecht was being recognized (at least in part) for the level of his research into historical fencing, I wanted to make this rapier sheath as historically accurate as possible (with a nod given to the fact that the rubber blunts on our rapiers mean we need a tube core for a sheath instead of the historically accurate flat wooden core). 

The tooling pattern is based on examples found in "Knives and Scabbards". The top  portion of the sheath has side by side heraldry where I've alternated between the laurel wreath (the symbol of the Order) and Albrecht's personal heraldry. Heraldry is very common on these types of objects, this one is similar to what can be seen in item 433 (p.140) or 436 (p.142). Down the remainder of the sheath is a pattern similar to what is called a foliate in "Knives and Scabbards", again a fairly common pattern - examples can be seen in item 444 (p.145) or item 490 (p.164). I've simplified it to be a double loop repeating pattern rather than one continues pattern and turned it into more of a geometric pattern rather than leaves and branches, I've also enlarged it to better fit the larger scale of a rapier sheath since the original was just a small dagger. To fill in the extra space in the pattern since the shape is now much larger, I used two different wolf stamps, since the wolf is a key symbol for Ealdormere and stamping of leather is an entirely period process. The effect is similar to what was done in plate 25 on p.167 with a lion passant stamp.

I also used fully period tooling techniques on this one. That basically means that I didn't cut the pattern into the leather using a swivle knife (which is a modern tool). It was just etched onto the leather and then I used my shaping tools to give it depth. It's hard to see the difference unless you look really closely at two items done with the different techniques, but it does affect the depth of the tooling marks a bit.

The brown dye is a modern antiquing dye to replicate the colours that would have been produced in period (mainly because I've yet to work out a period brown dye - but I'm working on it). I used the antiquing dye because it also helps highlight the tooling marks so that they stand out better since I wouldn't be using different colour to make them stand out.

Here are the pictures from start to finish. This is easily the most complex and detailed tooling project I've done so far:


Saturday, 11 July 2015

And the winner is.........

So you may remember that this spring I offered up a prize of a custom tooled leather rapier sheath to help raise funds for Lady Emelote's trip to cook in the Tudor kitchens at Hampton Court. Well, she's just a few weeks away from heading out on the trip, so I thought it was about time to do the draw.

All people had to do to get into the draw was make a donation (and I had to know they had made a donation obviously, but thankfully the online system kept track of that unless the donation was anonymous).

For every $25 dollars donated, I dropped a ticket into the draw, so if you donated more you got more chances to win.

Here's the link to my original post about the fundraiser.

So with no further ado, the winner of the custom rapier sheath is (drumroll please): ..................................................................................................................................................................................................................................

Their Excellencies Percival and Christiana!!!!!!!!!!!!!!!!!!

(Insert dancing winged snail and bee here)

Congratulations!

Tuesday, 3 February 2015

Win a custom rapier sheath - Fundraiser for a research trip for Lady Emelote

As some readers may know, Lady Emelote participated in a CBC fundraiser for the Ottawa Food Bank last year and as part of the program was granted her food wish of cooking at Hampton Court in the Tudor Kitchen. This is very rare and a huge opportunity for her (and for us as she has promised to pass on what she learns). Here's the link for more info on how this all happened (and how to donate).

The one catch is she needs to pay her way to England and expenses while she's there, and that's where this e-mail comes in. The economy is tight for everyone so I thought I'd offer some incentive to help Emelote out. :)

You may have seen my rapier sheaths in previous posts (if not there are pictures in the photo album page at the top of the blog). As a fundraiser to help Emelote get to Hampton Court, I'm going to do a draw for a custom rapier sheath. You can help design the tooling pattern and then we'll do it up to fit your sword in the colours you like. There are currently only six in existence (including the prototype that I use) so this is a limited time offer!

So, for every $25 you donate, you will get a token in the draw. No limit on how many tokens a person can have, just based on how much is donated. So if you donate $50, you get two tokens. Just let me know when you've made your donation and I'll add you to the draw. You can comment on this blog post or send me an e-mail to let me know.

Please feel free to share with anyone you think might be interested. It doesn't need to be limited to Ealdormere, we want as many people in the draw as possible.

Once the project is done and delivered I'll post pictures on the blog (with permission from the recipient of course).

Here's a link to the Campaign on fundraizr.com: http://fnd.us/c/9vat2

Let's get Lady Emelote to Hampton Court!

Friday, 9 January 2015

Starting my Research on Leather Filigree

Leather filigree or cutwork  is something I've never done before but after our trip to the UK this fall I'm thinking about doing it as my next type of leatherwork I want to explore. It will fit well as a way to decorate many of the types of items I've already been learning to make.

Basically, the idea is to cut out pieces of leather from your item so that you can see the underlying material. Often, the cutwork leather will be layered with a coloured piece of paper or fabric, so that the nicer colour will show through (often a colour that you couldn't produce on the leather itself). In the case of shoes, the cut-outs would reveal the colour of the hose being worn underneath.

There are lots of artifacts with cutwork or filigree. You often see it on shoes, jerkins etc. However, the most impressive I've seen was from the really cool Islamic leatherbound books at the Chester Beattie Library, which is what's really inspired me for this research. The level of detail was incredible (we're talking extremely complex patterns cut-out so that there was only milimeters of leather left between the shapes). I have no idea how they did it (but why not learn). Of course, something tells me its also going to lead me down the bookbinding path as well. :)

So as a starting point, I thought I'd gather some period examples of leather filigree here, along with links to useful information and more modern how-tos.

Period Examples & Documentation

Online article on the use of filigree in book covers from the 15th & 16th century: http://islamic-arts.org/2011/filigree-bindings-of-the-mamluk-period/

Article on the bookbinding of the Ottoman Empire: http://www.home.umk.pl/~tsb/sites/default/files/numer9/rukanci.pdf

The Chester Beattie Library Guidebook (which we bought on our trip): http://www.cbl.ie/Shop/Guidebook-to-CBL.aspx

Pinterest board of filigree/cutwork artefacts: http://www.pinterest.com/DafyddapAlan/leather-filigreecutwork

Modern How-Tos and References
Discussion on Leatherworker.net about how to do filigree: http://leatherworker.net/forum/index.php?showtopic=33670

Sunday, 16 November 2014

Gift for Robert the Blue and Lerthan (With Picture)

I haven't posted much to the blog lately for a couple of reasons. One is that we were in the UK for a few weeks on a vacation/research trip, so you can expect another post shortly about that. The other reason is that I was working on some things that I didn't want certain people to know about. :) This is one of those things.

As part of the trip, we were staying for a few days with some friends who moved to England a couple of years ago. When they left I had just finished working on my Ealdormere award badge patterns, and RJ had talked about wanting some belt badges for his awards (he has a Maiden's Heart and a Scarlet Banner).

I figured since we'd be seeing them I should probably do up the badges finally, and that I needed to do the same for Lerthan as well. I haven't yet figured out the engineering I want for the belt loops but I figured if I brought the raw badges they could applique them or use them for something else as well.

Here's the picture of the sets of badges that I did up.


The best part is that little Maggie (who's not so little any more) apparently really liked that badges and wanted to know why she didn't get one. So, I've now been commissioned to do a badge for Maggie with a rainbow on it. :)

Monday, 8 September 2014

A Gift for Kersteken (with Pictures)

I haven't posted in the last few weeks because I've been working on a secret project, and didn't want to even hint at it because I didn't want a certain someone to guess I was working on something for them.

Now that we're all clear, here's what I've been working on.

This past weekend at Feast of the Bear in Toronto, a good friend was inducted into the Order of the Pelican for her service to the realm. Not only is Kersteken super deserving of the honour, but she's also a local fencer. In fact, she's one of the first fencers to get authorized that I had helped to teach. As far as I can tell, the only time you won't find her on the rapier list at an event is when she's in the kitchen, doing entourage or otherwise working (it seems like she's always working, but also always on the rapier list - maybe she has a clone. That would explain how she gets so much done).

Anyway, I decided that I needed to do something special for the occasion. That of course meant making her a rapier sheath.

I had to do a bit of plotting though, so I tricked Kersteken into letting me know how long her rapiers are. It went something like this:

Me: Woe is me, one of my swords is going to need to be replaced soon. Maybe I should look at getting a longer rapier. Kersteken, you use a longer sword don't you?

Kersteken: Go longer for sure! I can bring my extra one next week to practice so you can try.

Me: Cool. How long are they? I think my current one is 35 inch.

Kersteken: 41 & 42

Snort! Done and done.

Then I contacted Master Brand, who was able to track down the artwork for her personal heraldry (I don't think I'd ever even seen her personal heraldry before so this was neat).

I wanted the sheath to have the pelican badge on it. Of course, if you followed my badge carving project a few years ago, you'll know I didn't do that one because its insanely detailed. And this one was going to be really small, only a couple of inches high, so the cuts are all really small and finicky. That meant the first step in making the sheath was to figure out the badge.

Here's a pic of my practice attempt, which I think isn't bad:


I then carved the pelican on a band of leather (I didn't want to carve it directly on the long piece for the body of the sheath since I only had the one piece long enough to make it - no second chances there). Here's the finished piece painted and ready to be attached. BTW - Good call by Avelyn to use the mustard to mark the little beaks on the chicks so it's more obvious what they are!:


Once that was done, it was on to carving her heraldry onto the sheath, which was comparably easy. :) Biggest challenge was figuring out which parts to raise and which to push back into the background. Here's the tooling pre-painting:


And here are some shots of the main body piece before I started sewing it up:


Finally, here are some pictures of the finished piece once I glued and stitched up the join and did all of the touch-ups on the edges and holes. The band at the top is proportionately thicker than I usually do because I was concerned about making the pelican any smaller. But since Kersteken uses a much longer blade than I usually work with (this is designed to fit a 42 inch rapier), it is relatively proportional.


Overall I'm quit happy with how it turned out. There are some things that I would do differently next time, but I'll keep them to myself (although I've talked with Mistress AElfwyn about what I'd change). The most important thing is that Kersteken (I guess that should now be Mistress Kersteken) really, really liked it.

Now back to your regularly scheduled stick-purse updates. :)

Monday, 21 July 2014

Catching up and Planning Ahead

I haven't posted here in a while, largely because I haven't really done much leatherworking lately.

I did manage to finish my pair of leather turnshoes and entered them in the A&S competition at Summer Siege in June, but never did take a picture of the completed set. :) Guess I was too busy taking pictures of the other entries.

Beyond that, I did a little of bit of tooling work on an award badge I'd started a while back, so its ready for dying/painting now.

I did have a bit of a idea on how I can engineer a way to mount my award badges on belt loops without needing to use glue or anything modern, and without punching holes through the actual designs. I need to use thicker leather to do it though so I can't test the idea with my current batch of badges.

For my secret project, I've done some design work and tested the tooling patterns a bit. It's going to test my ability but should be doable. I'm now in a bit of a holding pattern.

Not having done much leatherworking, you know I've been doing something with my time though, right?

Actually, I've been testing a bunch of period recipes for future use. We've always said we wanted to get a good collection of recipes that we've actually made so that we can pull off a feast with less planning needed (see the miracle Kersteken and Sven pulled off at Coronation as reference). I've made a good dent in that for sure, including a couple of recipes I don't think I've ever seen at a feast (probably because they would be hard to pull off in a normal feast kitchen - one needs a rotisserie and the other needs to be steamed, which would be hard to do for a feast of 40-50 people).

I need to start thinking about the QPT, which is coming up again this fall. My original plan was that my secret project might make a good entry but I'm not sure if it will be ready by that point at the rate we're going. I could do another pair of shoes, maybe with a bit more complexity to the design? Or, I could present where I am right now with the stick-purse (with non period-appropriate materials) and get feedback on that? The documentation is in good shape, I've just be stalled while I search out the right leather to use.


Wednesday, 19 March 2014

My next research project - the concept

A while back I posted following a conversation with Mistress AElfwyn, where she asked me what my next project would be now that I'm almost done the formal portion of the leather dyes. Of course, I expect the leather dye work will continue for a long time, but I had posted some ideas of what I could work on next.

Then, a couple of weeks ago I ran into AElfwyn again at the local leather store, and she asked me a question about how I did my leather tooling. After showing her my technique using a swivel knife, we had a bit of a discussion about whether that would have been how it was done in period (using cuts as a basis for the tooling pattern).

So, the discussion has been sitting with me since then (with a few more brief exchanges with AElwyn thrown in about the topic).

And of course, I can't just leave a question like that floating out there without a solid answer. Based on the two books I have on hand it looks to be true, but I think this calls for a research paper. :)

So, here's what I'm thinking:

Research paper on specific decorative techniques that would have been used at various periods, along with possibly work on identifying the specific tools that can be documented to have been used.

Step 1: Online research to see what else has been done by others. This includes reading the Floriligium and other online resources. Will want to do my own cross-checks on anything but could give me a good idea of primary and secondary sources to check. Should also check research journals for relevant materials.

Step 2: Documentary search of sources identified in step one and review of materials.

Step 3: Museum research to look at artifacts to determine evidence of techniques and tools used (This would be a good time to do another trip to the UK to see them up close). If can't go in person, perhaps contact museums with significant leather collections to discuss if they have done any similar analysis.

Step 4: Analysis and writing up of research, and any follow-ups necessary. Probably for submission at a future Kingdom A&S.

So I figure that'll take me what...2-3 weeks. :) OK, maybe not.

I can then turn my research into a period leather tooling class to fit in alongside my Intro to Leatherworking I taught this year, and the period leather dyes class I plan to develop this spring. A pretty good triumvirate of courses I think.

Sunday, 16 March 2014

Gulf Wars Gift Basket Contribution (With Pictures)

This post was written in advance but now that everyone is headed back from Gulf Wars I expect it should be safe to post without revealing any surprises.

At the major SCA wars, it's tradition that the various royals exchange gift baskets. Often these baskets are made up of various items made by the populace of the giving kingdom. We know in advance which kingdom's royals will be receiving the basket, so we often keep that kingdom's heraldry and colours in mind when donating the items.

This year for Gulf Wars, the recipient of Our Majesties' gift basket is Trimaris. Over the past couple of months, Her Majesty had placed a call out to the populace to for items for this gift basket.

Avelyn had the idea of donating a starter set of silk banner supplies, so we pulled together a quick collection of various colours of silk dye, along with some gutta.

I wanted to do something a bit more personal, so my contribution was of course a leather item. After some discussion, I came up with the brilliant (note: some sarcasm implied) idea of doing one of my rapier sheaths for the gift basket. Now, this isn't itself such a bad idea. The problem was that it took me so long to decide what to contribute that I'd left myself very little time to make the sheath. I basically only had a couple of weeks between when I made the decision on the sheath and Practicum (which was the last event I would see Her Majesty before she left for Gulf Wars).

For those that haven't seen one of my rapier sheaths, they are fairly time and resource heavy to make. The core of the sheath is a plastic plumbing tube that will help protect the sword from bending in transport. I then cover it with leather, which is tooled and dyed as appropriate.

There are now only five of them in existence (I have my original prototype, I gave one to the Barony when I stepped down as rapier champion, Lady Thora received a special one as a going away present and there's one in Dragon Dormant with the winner of the Border Spat tourney I ran two years ago). In all, they take probably anywhere from 10-20 hours of labour to make (actual work time, not including drying time etc.), depending on the complexity of the leather tooling and whether I have to develop a carving pattern or its something I've made before. They also require a particularly long piece of leather since you need a single piece that covers the length of the sheath - in this case about 3 1/2 feet long).

I wanted to tailor the sheath for Trimaris, so I also developed a carving pattern for their populace badge (thankfully their badge is an easy design - Thank You! to whoever designed it) and custom mixed a blue dye that would be the appropriate colour for their heraldry.

All in all I think it turned out pretty well. I hope Their Majesties of Trimaris like it, and that it will work for whoever ends up with it. I attached a little card with my contact information so who knows, they may even be reading this post some day (if so, Hi!!! Hope you like it).

And now, to the pictures: